# Siemens Step7 TIA Portal

## Supported Configurations

**Key:**

<mark style="color:green;">**✓**</mark><mark style="color:blue;">**:**</mark> Part of a supported configuration

<mark style="color:red;">**✕:**</mark> Not supported and no plans to add support

🏗️: Support in-progress or planned

<table><thead><tr><th width="393">TIA Portal Version</th><th>Supported?</th></tr></thead><tbody><tr><td>TIA Portal v20</td><td><mark style="color:green;"><strong>✓</strong></mark></td></tr><tr><td>TIA Portal v19</td><td><mark style="color:green;"><strong>✓</strong></mark></td></tr><tr><td>TIA Portal v18</td><td><mark style="color:green;"><strong>✓</strong></mark></td></tr><tr><td>TIA Portal v17</td><td><mark style="color:green;"><strong>✓</strong></mark></td></tr><tr><td>TIA Portal v16</td><td><mark style="color:green;"><strong>✓</strong></mark><strong> [1]</strong></td></tr><tr><td>TIA Portal v15.1</td><td><mark style="color:green;"><strong>✓</strong></mark><strong> [1]</strong></td></tr><tr><td>TIA Portal v15 and earlier</td><td><mark style="color:red;"><strong>✕</strong></mark></td></tr></tbody></table>

| PLC Network Configuration                     | Supported?                              |
| --------------------------------------------- | --------------------------------------- |
| **Profibus**: access directly via slot        | <mark style="color:green;">**✓**</mark> |
| **Profibus**: access via named subnet         | <mark style="color:green;">**✓**</mark> |
| **Profinet:** access directly via slot        | <mark style="color:green;">**✓**</mark> |
| **Profinet**: access via named subnet         | <mark style="color:green;">**✓**</mark> |
| **Profibus**: access via Profinet Gateway PLC | 🏗️                                     |
| **Profinet**: access behind L3 Network Switch | 🏗️                                     |
| **MPI**: All Configurations                   | 🏗️                                     |

| PLC Model           | Supported?                                            |
| ------------------- | ----------------------------------------------------- |
| S7-1500 Non-Safety  | <mark style="color:green;">**✓**</mark>               |
| S7-1500F Safety     | <mark style="color:green;">**✓**</mark>               |
| S7-1200 Non-Safety  | <mark style="color:green;">**✓**</mark>               |
| S7-1200F Safety     | <mark style="color:green;">**✓**</mark>               |
| S7-300 Non-Safety   | <mark style="color:green;">**✓**</mark>**&#x20;\[2]** |
| S7-300F/400F Safety | <mark style="color:red;">**✕**</mark>                 |
| S7-400 Non-Safety   | <mark style="color:green;">**✓**</mark>**&#x20;\[2]** |

\[1] **TIA Portal 15.1 & TIA Portal 16:** Nested block structure is not preserved.

\[2] **S7-300 & S7-400 Non-Safety PLCs:** Cannot back up variable names or symbol tables.

## Agent Requirements

Below are the Agent system requirements to configure a Copia Agent for the backup of Siemens Step7 TIA Portal projects:

* You will need a licensed copy of Siemens Step7 TIA Portal (see [supported versions](https://docs.copia.io/docs/overview/supported-vendors-and-device-types)) that is capable of backing up a Project from the Device(s). If there are many versions of a Project that will be managed by the Agent, each version should be installed. In addition, any additional vendor software must be licensed and installed on PC running the Copia Agent. (i.e. GSD files, Add-on's etc.). The Agent should be able to backup the project without error.
* Siemens Step7 TIA Portal on the Agent needs to be configured with a Start View of "Project View". This is accessible in the Options -> Settings menu within Siemens Step7 TIA Portal.
* The "logged in user" needs to be a part of the Siemens TIA Openness user group in Windows. See below for instructions:

{% file src="<https://3704730939-files.gitbook.io/~/files/v0/b/gitbook-x-prod.appspot.com/o/spaces%2F4lSQNVI3DZ15V7kjkMCA%2Fuploads%2F1GL20bS1ybOulGfRoF6M%2FAdding_Copia_Windows_User_to_Siemens_TIA_Openness_Group.pdf?alt=media&token=ebd7ded7-bb30-4fda-b487-784c6091cd42>" %}

* The Agent must not be locked while working with Siemens Step7 TIA Portal, as it needs access to the software running on the desktop.  As such, Copia recommends running the Agent in a VM environment, and restricting access via the host system.
* The Agent should be tested to confirm that it can backup the PLC(s) using the vendor software.

## New Project Configuration

To configure a new project for Siemens Step7 TIA Portal, you will need to already have a repository created with the Siemens Step7 TIA Portal `.zap##` file.

Click either of the *Add a Project* buttons in the Projects tab.

<figure><img src="https://3704730939-files.gitbook.io/~/files/v0/b/gitbook-x-prod.appspot.com/o/spaces%2F4lSQNVI3DZ15V7kjkMCA%2Fuploads%2Fne2KmUwhbSS6N4IXtece%2FWebApp_Projects_FANUC_AddProject.png?alt=media&#x26;token=80e5f56f-c026-4621-b3db-5a09d59b4576" alt=""><figcaption></figcaption></figure>

The *Add a new project* configuration dialog will appear which allows you to fully configure the project, devices and job for the project.

{% hint style="info" %}
Any items highlighted with an asterisk are required.
{% endhint %}

<figure><img src="https://3704730939-files.gitbook.io/~/files/v0/b/gitbook-x-prod.appspot.com/o/spaces%2F4lSQNVI3DZ15V7kjkMCA%2Fuploads%2FcwaXoFHfSdW3yPKP7gF1%2Fnew_project_flow_a.png?alt=media&#x26;token=600d35fd-b785-4180-826b-1d53f4d0b972" alt=""><figcaption></figcaption></figure>

This is a multi-step process with each section explained in detail.  At any time, you can edit the prior section of this workflow.   &#x20;

{% hint style="info" %}
Project can be edited after creation.  Devices and Jobs can also be edited or created directly, using the Devices or Jobs tab.  The steps for creation are similar to the steps provided below for those sections.
{% endhint %}

### Define the Project

To get started, we will first select the *Project Type* from the list provided, and then select an *Agent*.  If you have not already created an Agent, you can create and assign an Agent at a later time.  See more about this in the [Agents ](https://docs.copia.io/docs/devicelink/sitesandagents/agents)section of the documentation.

When complete, press *Save and Continue*.

<figure><img src="https://3704730939-files.gitbook.io/~/files/v0/b/gitbook-x-prod.appspot.com/o/spaces%2F4lSQNVI3DZ15V7kjkMCA%2Fuploads%2FoQDnz7eZqxis40HQNzUC%2Finit_proj_setup_a.png?alt=media&#x26;token=1e41ab44-86ba-4d79-8505-ee5d2bdcced4" alt=""><figcaption></figcaption></figure>

You will now select the Project Path, which is the location (Repo/Branch) that the project is, or will be stored.

{% hint style="info" %}
As seen, you can edit the previous steps at any time.
{% endhint %}

<figure><img src="https://3704730939-files.gitbook.io/~/files/v0/b/gitbook-x-prod.appspot.com/o/spaces%2F4lSQNVI3DZ15V7kjkMCA%2Fuploads%2FTXC4zpxu7bi59joyDZ2h%2Finit_proj_setup_b.png?alt=media&#x26;token=2286ea2f-9c83-49ba-83d4-86108df6ff96" alt=""><figcaption></figcaption></figure>

You will only be allowed to select the appropriate filetype or folder that is allowed for the Project Type.  In some cases, a project is required to perform a backup, in other cases, the backup can create the initial backup into an empty project folder.

Once selected, press *Save and Continue* to proceed.

<figure><img src="https://3704730939-files.gitbook.io/~/files/v0/b/gitbook-x-prod.appspot.com/o/spaces%2F4lSQNVI3DZ15V7kjkMCA%2Fuploads%2F7bnElZ26guA8Y5LaTSTI%2Fproj_path_a.png?alt=media&#x26;token=cce5a818-79a3-4b2f-a150-f6af0b826e4c" alt=""><figcaption></figcaption></figure>

The project details allows you to update the Project name, and description if desired.

<figure><img src="https://3704730939-files.gitbook.io/~/files/v0/b/gitbook-x-prod.appspot.com/o/spaces%2F4lSQNVI3DZ15V7kjkMCA%2Fuploads%2FwlA4TMc5jzuOZNK5t77p%2Fproj_details_a.png?alt=media&#x26;token=b7f3dc7f-6d2b-4e23-a22d-5dc59961fb1c" alt=""><figcaption></figcaption></figure>

## Define the Device(s)

The Device Setup section is for defining the device information (PLC, network, authentication, etc.) that is in your project.  If you have pre-created devices, you can add existing devices, otherwise you can *Add a Device* as seen. &#x20;

<figure><img src="https://3704730939-files.gitbook.io/~/files/v0/b/gitbook-x-prod.appspot.com/o/spaces%2F4lSQNVI3DZ15V7kjkMCA%2Fuploads%2FIDRc31G0HQMoY6sdHf91%2FUpdatedAddDevice%20(1).png?alt=media&#x26;token=f68257b8-5953-408f-b397-0f509e2a2385" alt=""><figcaption></figcaption></figure>

Fill in all required fields, and any fields that are applicable. &#x20;

* Enter a **unique** name in the *Device Name* field.  A common choice may be "*projectname\_devicename"*, where devicename is the same as the next field.
* In the *Device Name in Project* field, enter the name of the PLC exactly how it appears in the Siemens Step7 TIA Portal project tree, as seen below.

<figure><img src="https://3704730939-files.gitbook.io/~/files/v0/b/gitbook-x-prod.appspot.com/o/spaces%2F4lSQNVI3DZ15V7kjkMCA%2Fuploads%2FGlimbwvNyYjNdj6zq9Ev%2FS7TIA_DeviceTree.png?alt=media&#x26;token=319ffe73-9980-4141-b17b-7e024b07f532" alt=""><figcaption></figcaption></figure>

* Enter a Description.&#x20;
* **Safety Password**\
  \*\*\*\*Required to backup/compare any Safety PLC

{% hint style="danger" %}
For Safety PLC's, you will need to enable the following option when downloading, to be able to upload from those devices (*Safety Administration > Settings > Advanced Settings*):\
&#x20;![](https://3704730939-files.gitbook.io/~/files/v0/b/gitbook-x-prod.appspot.com/o/spaces%2F4lSQNVI3DZ15V7kjkMCA%2Fuploads%2Ftjn81vrL5UdpHydkiUJY%2FS7TIA_SafetySettings.png?alt=media\&token=1a95a18a-d76f-42fa-b65f-9757647d4149)
{% endhint %}

* PG/PC interface Type\
  Copia currently supports Profinet and Profibus communications.  Select the type that will be used.
* PC Interface\
  Enter the interface that is used to communicate with this PLC. The PC interface can be found in TIA portal shown here: <br>

<figure><img src="https://3704730939-files.gitbook.io/~/files/v0/b/gitbook-x-prod.appspot.com/o/spaces%2F4lSQNVI3DZ15V7kjkMCA%2Fuploads%2F5SxugUq2ibVD9zQlLxrP%2Fpc%20interface.png?alt=media&#x26;token=abf33416-9194-4162-a343-d49487a53bcd" alt=""><figcaption></figcaption></figure>

* Subnet Name / Slot Number\
  Copia supports communications to the device regardless of subnet configuration in TIA Portal. If the subnet is defined for the device, enter it into the *Subnet Name / Slot Number* field. If no subnet is defined, enter the Slot in the *Subnet Name / Slot Number* field.&#x20;
  * A subnet example of `PN/IE_1`  is shown in the green outline below.
  * A slot (no subnet) example of `2 X1`  is shown in the red outline below.

<figure><img src="https://3704730939-files.gitbook.io/~/files/v0/b/gitbook-x-prod.appspot.com/o/spaces%2F4lSQNVI3DZ15V7kjkMCA%2Fuploads%2FN8FJdCCtESVxvVIRFdhN%2FS7TIA-Slot-Subnet.png?alt=media&#x26;token=d09cc42e-536f-4666-afe8-eb4f5eb9df7f" alt=""><figcaption></figcaption></figure>

* IP Address\
  Enter the IP address / Address of the PLC, as found in the Address field seen above.

Press *Save Device* when complete.

At this point, if it is a multi-device (PLC) project, you should continue to add all of the devices.  Once complete, you can proceed to *Add a Job*.

<figure><img src="https://3704730939-files.gitbook.io/~/files/v0/b/gitbook-x-prod.appspot.com/o/spaces%2F4lSQNVI3DZ15V7kjkMCA%2Fuploads%2FcjYLHvHR5VX2SWQpk3vl%2Fdev_setup_d.png?alt=media&#x26;token=2cc871ad-0e80-4a0a-8d36-578530d0ac43" alt=""><figcaption></figcaption></figure>

### Define the Job(s)

Creating Jobs is similar for all vendor types, and is described in the [Creating Jobs](https://docs.copia.io/docs/devicelink/jobs/creating-jobs) section.  It is recommended to review that section while completing a job configuration, and press Save to save the job.  You can create more than one job for a device if desired. &#x20;

### Submit the Configuration

Once complete, press *Submit Project Setup* to create the Project, Device(s) and Job(s).

<figure><img src="https://3704730939-files.gitbook.io/~/files/v0/b/gitbook-x-prod.appspot.com/o/spaces%2F4lSQNVI3DZ15V7kjkMCA%2Fuploads%2Fl0yMmDpDTH4xT0s2ObRn%2Fjob_setup_c.png?alt=media&#x26;token=92942e48-fb39-4334-8881-50b1a2bddfc2" alt=""><figcaption></figcaption></figure>

{% hint style="info" %}
Don't forget to enable/disable the [Watch ](https://docs.copia.io/docs/projects-and-devices#watching-a-project)button, based on your preferences for project [Notifications](https://docs.copia.io/docs/devicelink/administration/notifications).
{% endhint %}

### Troubleshooting

#### Unsupported Project Language

TIA Portal will throw an error during the upload of a PLC if the offline and online projects use different languages. During the upload, TIA Portal will populate an error similar to the one below:&#x20;

<figure><img src="https://3704730939-files.gitbook.io/~/files/v0/b/gitbook-x-prod.appspot.com/o/spaces%2F4lSQNVI3DZ15V7kjkMCA%2Fuploads%2Flu9QhyZj8QKm4jRtGiZV%2FTIA%20Portal%20Unsupported%20Language%20During%20Upload.png?alt=media&#x26;token=d0f94cfd-6c1f-4744-afd3-757e5aac4d07" alt=""><figcaption><p>
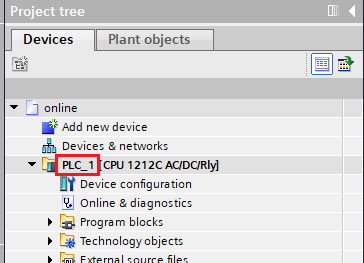
TIA Portal Unsupported Language</p></figcaption></figure>

To fix this, follow these steps

* Navigate to the Project Tree > Language & resources > Project languages.
* Select the language(s) specified in the error text. For example, in the error above, the user would want to check Italian only in the settings.

<figure><img src="https://3704730939-files.gitbook.io/~/files/v0/b/gitbook-x-prod.appspot.com/o/spaces%2F4lSQNVI3DZ15V7kjkMCA%2Fuploads%2FrJ2ttPZJWEMGkuSYTchG%2FTIA%20Portal%20Project%20Language%20Settings.png?alt=media&#x26;token=2ad02d83-30e2-483f-b5b7-aaa5e2076520" alt=""><figcaption><p>TIA Portal Project Language Settings</p></figcaption></figure>

* After the correct language is selected, save, and archive the project.&#x20;
* Using the Copia Desktop application, commit and push the updated project to the Repository and Branch used by the associated DeviceLink job.
* The next job run should result in a successful upload.
